[ad#blue-links]
Taking interesting, clear photos of any living, moving creature is a combination of skill, technique and proper equipment. This article will provide some general tips for taking a good, clear photo of your gecko and editing out some of the more distracting background elements.
General photography tips
Background:
I don’t use one. But I guess a black background, or the plastic backgrounds used for aquariums will create a more natural looking effect.
Posing the Gecko:
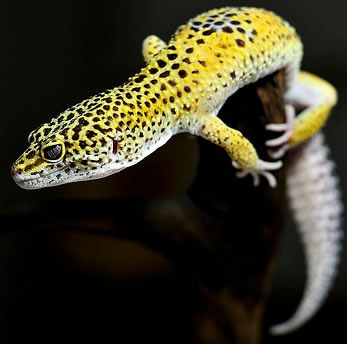
I set my camera to burst mode and continuously shoot the gecko while it is moving. When putting the gecko on the drift wood, as in the example below, it tends to roam around, and doesn’t want to stay put. That’s why I had to hold the wood on my left hand, and shoot using my right hand.
Focusing the picture:
Geckos on wood won’t stay still. Ever. 🙂 DSLR users will not have a problem focusing on the gecko because DSLR’s focus much faster than an ordinary point and shoot camera. If the picture is coming out blurry, it’s likely that the focusing is off the subject. For precise sharpness, the point of focus should always be on the gecko. For DSLR users, just set the focus to single point focus. If you use spot metering, there is little chance that your picture will be over- or underexposed. But in case this happens, set the DSLR to A mode, then -1 EV to correct for overexposure and set it to A mode, then +1 EV to correct for underexposure.
Now, here’s an example using a picture of one of my geckos:
Follow these steps and see the result of my photo at the end of this post.
How I Took My Picture
Gear List:
- Nikon D300s
and Nikkor 18-55 VR
kit lens - Basic desk lamp
22w - Drift wood
- Adobe Photoshop CS3
Here are a few tips in shooting your pets at a very minimal cost in terms of lenses and lighting set-ups. I will be using my own photographs to let you see how the original image looks, and how it appears after I edit it with a very simple work flow that will make your images stand out.
First, I used a DSLR (Nikon D300+18-55 VR lens) for this shot, and the 22w desk lamp. As you can see in the original image, the gecko and the wood are well lit, yet the background is already quite dark. The secret is, put your metering to SPOT METER, turn off the room light, use a dark background as much as possible, and focus the meter on the lightest part, which in our example is the gecko. Place the lamp 45 degrees on the side (not top) of the gecko to reduce unwanted shadows. For this shot, the lamp was positioned on the left facing the gecko. Be patient when shooting these animals since they move fast. I was holding the drift wood with my left hand, while shooting with my right… These creatures really are fast movers I tell you.
[ad#sponsor]
Now after taking the shot, open the image with Photoshop. I use the CS3 version but any version would suffice. Here is the step by step work flow that I used to make the final image:

- Open file with Photoshop
- Click: Image/ Adjustments/ Auto Levels
- Click: Image/ Adjustments/ Brightness & Contrast
- Values – BR: -15 / CT: +25
You will see a big difference in terms of contrast range and brightness level at this time. But we have to do something about the background which is quite distracting because of the variation in color.
- Click: Burn Tool (Hand Icon on the left), set the Range to Shadows, with an exposure of 20.
- Right click on the image, and select the diameter size of your choice. Hardness should be set to 0.
- Now brush the light portions of the background to make it black.
Now that we are done with the background. Let’s clean up the image a bit. This time we will edit out the specks on the wood:
- Click: Healing brush tool
- Set the right diameter for the speck.
- Press ALT beside the speck to replicate the wood.
- Release ALT then click on the white speck.
- You can continue the same way, cleaning up all specks that seem distracting in the image.
The image is now cleaned up, and everything looks good. The last thing to do is to re- size the image for web posting. Make sure your color space (located at: EDIT, color settings) is set to sRGB. This is the color space the web uses. If you accidentally set your image to aRGB (which is used for printing), there will be unwanted color changes when you post it on the web.
- Create a new layer (CTRL + J)
- Click on filter, then sharpen. Do this twice.
- Click on image, then image size. Set the size you want.
- I did a 800px on the longest end.
- Click on filter, then sharpen.
- Adjust the opacity of the layer (located on the layer palette) to your taste. I did 50%.
- To see the difference in sharpness, you may want to click on the eye icon of the layer.
- When all is done, right click on the layer and flatten image.
That’s it! Save the image as jpeg.
Before & After
By following these simple steps in Photoshop you can achieve results similar to the example below. Hover over the image to see an edited version.
[ad#300]


Hi,
Sry for my bad english, Please.
I think its a nice work but I Think when you edit or fake your Pictures It’s not the true for the customers. I’m design self Homepages, Logos and Pictures. But I don’t fake my Pictures. But I musst say its a Nice Work 🙂
Nice Greatz from Germany